Showing posts with label diy. Show all posts

Monday, March 25, 2013

{diy} chair facelift

first of all, let me apologize. i've been MIA and i'm sorry. it's not you, it's me. life and jobs get in the way, forcing certain things to be put on the back burner. but while i've been rockin' the real estate world and styling everyone in northern virginia, my readers have suffered. my bad. i would like to say it won't happen again, but you never know. all i can say is that i will make it worth your while in the coming weeks. pinky swear. scouts honor. and all those other phrases.

so now that i've gotten that out of the way- let's diy some stuff! YAY! this is my happy place. i love to give things a makeover or a facelift if you will. i mean, we all saw my kitchen, my bathroom, and my adorbs twin stools. swoon. but this weekend i turned my attention to my office chair. and, boy, did it need it!

yet again, this was one of my grandma's chairs. she was a fashion designer and from nyc, so i am assuming that back in the 70s, this color and print combo was uber chic. fast-forward to 2013 and not so much. here's a lovely before pic.


months ago (maybe even almost close to a year ago) i spotted this fabric i wanted at my joann's superstore in leesburg. it's seriously one of the best in the area. it's almost like a homegoods/joann's hybrid and i heart it. i've gotten some great things there for super cheap. i bought 4 yards of the fabric just in case we had any issues- pretty sure it cost me like $10 total. score. thank you, rando joann's coupons online.

and then the fabric sat in my condo. collecting dust until this past friday where i legit had a convo with myself. 'lauren, what are you waiting for? can't tell if you'd like that color spray paint from home depot? hello- paint over it again if you don't. just get it done.' so i convinced myself to get on it and rustoleum's leafy green spray paint was my final choice.


i'm going to admit- i didn't sand or strip the pretty muted pumpkin/salmon color. i spray painted rustoleum's primer, let it sit for a few hours, and then spray painted the leafy green. it was seriously that easy. here's a nice before after color wise.


saturday: i decided to late-night tackle the cushion. i carefully ripped all the seams and used each portion of fabric as my template for cutting out the new fabric. and then i drank wine. so game over, saturday night.

sunday: i was like 'girl, get this done!' so i did. out came the sewing machine and- stupidity. seriously. i was so frustrated i vented to the facebook world.


after a few cups of coffee and scouring the interwebs, i finally found the users manual online. i was shocked. this sewing machine was a hand me down from my great-aunt and is from the 1970s. i thank the person that scanned the users manual- it was my savior. i provide pictorial proof of my 'vintage' sewing machine.


let me preface this and say i have never used a sewing machine IN MY LIFE. i took a home economics course in like 6th grade and vaguely remember learning to sew. but it was overseas and i think we sewed ethnic garb. i don't believe upholstery was not on the syllabus. so i was starting from scratch. and it was hard. but- I DID IT. here's the finished product.


now i do have some tips for this type of project, mainly around the upholstery portion. if you need tips on spray paint, then maybe this level of project isn't for you yet. ha.

TIP 1: when choosing a fabric, do one that is either a solid or a busy print where you won't notice mistakes. my cushion is FAR from perfectly put together, but you can't tell.

TIP 2: get some no-sew fabric glue. this was helpful especially when dealing with the cording.

TIP 3: save whatever you can. i didn't replace the filling or the cording. this i am sure saved me some moolah.

TIP 4: look beyond the icky and see the potential. this chair had been sitting in my parents house for years, with no purpose. until i came along. now it's a happy addition to my office.

xoxo Lauren

Monday, December 17, 2012

{diy} rustic foyer shelf

before i begin i'd like to explain my absence the past few days.

like most of the country, i have been glued to the news since early friday morning watching the horrific events that transpired in newtown, ct and the grief that has taken over all of our hearts since. words cannot begin to describe the sorrow that we are all experiencing along with the anger many of us have towards these senseless and selfish acts. how anyone can harm a child is incomprehensible to me. and yet, out of this tragedy  comes stories of bravery and courage by the educators at sandy hook elementary. may God shine down on your families in their time of need and welcome you with open arms at the gates of heaven.

so as i resume my blog posts, do not think that i am brushing over these events. i am doing so with a heavy heart and continued remembrance for heaven's newest angels.
____________________________________________

the search has been never-ending. i knew what i wanted, yet couldn't find exactly what i had envisioned. yes, i am referring to my foyer table. i know, i know. this is somewhat of a minimal item. but here's the thing- i don't really have a formal entry. my front door opens into my living room. however, i still wanted to assemble something that didn't take up too much room yet provided a place for keys, etc. and i have looked everywhere. pottery barn. crate & barrel. target. bed, bath, & beyond. overstock. amazon. so what to do when you can't find what you need?! make it yourself.

diy foyer shelf

i came to the conclusion that i wanted a shelf so there was still floor space. so to home depot i went and collected a piece of pine measured to about 40 inches and a wood stain in jacobean. total about $10. i wanted a rustic looking shelf to put underneath my home goods mirror. so sanding and staining began...


i purchased the two brackets from anthropologie for $25 each, totaling $50. so all in all, the shelf cost me about $60 and it's exactly what i wanted. here's the final product:


love, love, love. so happy. and proof that if you become familiar with your local hardware store and have a little vision, you can make it happen.

xoxo Lauren

Wednesday, December 12, 2012

{diy} the many uses of wine corks

i love finding or creating new uses for everyday products. i mean, it's pretty much the theme of my pinterest account- and everyone else's. the one item that i feel has a ridiculous amount of roles is the infamous wine cork. i pretty much save every wine cork i ever come across, mainly as glass fillers. but what to do when you're faced with a random situation and a need for decorative pushpin? a wine cork pushpin, of course. duh.

so a few years ago, mama riner and i traveled across the country for a girls' weekend in the san francisco bay area and wine country. what more can you ask for? it was an amazing trip filled with fun walks around the city, great food, and an amazing wine tour.


now one thing you will learn about me is that i love souvenirs. i'm not talking about t-shirts and figurines. i prefer to go the art or local route. i try to either pick up something that is unique to the area (got some amazing hand-painted chopsticks in sf's chinatown) or an art book/hand-painted art (recently got a great pencil sketch of a local church in new orleans). so while in sonoma, mom and i came across a really cool wine country map poster that included all of the vineyards we visited- for $12. score.


i waited about a year to frame it until i moved into my new condo. here's the thing- because it's a random shape, i couldn't find any pre-fab frames available anywhere. so the next logical approach was to get a quote from the local a.c. moore store. $500?!?! ridiculous for a $12 poster. that's when i started thinking outside of the box and came up with the solution: a cork board. here's the final result:


now to secure the poster to the board, i looked into all sorts of options. then my inner-diy-er came up with creating wine cork pushpins. so super simple and it definitely finishes it off while complimenting the piece.

all you really do it take a cork, figure out what drill bit is the a tad bit smaller than the actual pushpin for a snug fit, drill into the cork carefully, and then push the pin into place. love love love.


time to start thinking outside of the box for your own diy projects. ;-)

xoxo Lauren

Monday, December 3, 2012

{diy} kitchen re-do

one of the tips i always give homebuyers during their search is to always see the 'bones' of the property. no, i'm not advising people to search for dead bodies. ha. the point is to look past the decor, the personal items, the paint, etc to really see what it is that you are buying. do you like the layout? do you like the location? basically, of the items that you cannot change, is there anything you don't like?

my home purchase is a real life example. i briefly touched on this in my previous post about my bathroom re-do, but the kitchen was the epitome of the overall decor. the cabinets were beige and pickled. the countertops were pink formica. the main light fixture was a box light that, after removal, we discovered was also painted pink. all of this was highlighted by lovely original almond-colored appliances that were on their last leg to say the least. here are a few images from the listing.


instead of seeing the negative, i saw a blank slate of which i could do with it what i wanted. i liked the layout and the high ceilings. the cabinets, while an ugly color, were in good condition. i wasn't dealing with someone else's upgrade choices- i was getting to make my own. it was the perfect situation for me.

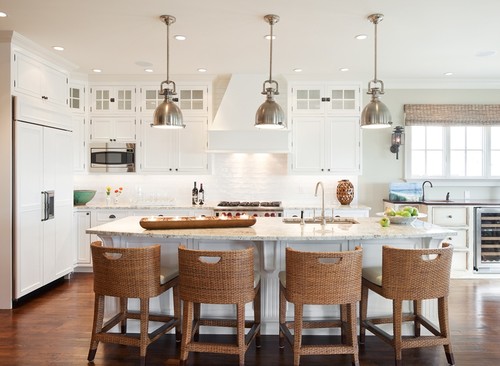
from here i decided on a french-californian aesthetic to match the rest of my condo. i knew i needed light colors in the kitchen since it has a large pass-through which can be seen from most of the living spaces. so soft white cabinetry with carrera marble and stainless steel appliances were it for me. little did i know how pricey everything would come to. here are a few pics of what i envisioned. i laugh to myself now when i see them. lol.


immediately, carrera marble was out and i was left to research alternative countertop options. of course i looked at the ever-popular granite colors, but none of them fit into the design i was looking for. after exhausting every website under the sun, i decided on bianco river silestone and found a local vendor that i trusted to install it. in order to cut costs, dad and i removed the formica countertops overselves. this is my...

TIP: if you can remove your old countertops yourself, do it. this saved me $400 at minimum. go to your local home depot, lowe's, or hardware store and explain what you're trying to do. they'll point you in the right direction of tools to purchase or rent.

it just so happened that there was a mix-up with my vendor and my selection was out of stock. what did i get instead?! an upgrade to a new silestone color that was introduced in 2011- lyra. to say i am pleased with the end result is a severe understatement. people always ask me if it is carrera marble. of course, i am quick to tell them that it's a cheap look-alike and proceed to give them my contractor's information. just that kind of person.

for appliances, i purchased all of them at my local best buy. i have a rewards zone membership, so this was a no brainer to me since i was able to get money back on my purchases which inevitably went towards a new blu-ray player. i also happened to catch them at a great time when they were having a sale offering free installation of the dishwasher. woo hoo! savings all around and i was able to get the french door fridge i had been drooling over. yay me!

now for the real project at hand: the cabinets. as i mentioned before, i looooved the color (did you sense the sarcasm?!). i began reaching out to all my painters getting quotes. would you believe that even with a realtor discount they were quoting me $3000 just to paint the cabinets?! for that money, i could have bought all new cabinets from ikea! i knew there had to be another option. so i was relentless in my research and stumbled upon rustoleom's cabinet transformations. i've already sung the praises of this product in my previous post about my bathroom vanity, along with provided detailed instructions/tips/tricks. so without further delay, here is the end result with the soft white kit. i opted not to use the glaze, but feel free to do so if you choose!


as you can see, it's an amazing transformation. i did install a subway tile backsplash myself which i will cover in a future post and am still mulling over flooring choices, but i am soooo happy with my kitchen. it completely fits my personality and just shows you that with a little vision, an ugly duckling of a room can turn into a beautiful swan.

xoxo Lauren

Monday, November 5, 2012

{diy} upholstery 101.

one thing i find dealing with small rooms or multi-purpose spaces is that the furniture isn't scaled to size or function. when you have a small space, you need items that can work no matter what your need is. a coffee table that also functions as an ottoman. a garden seat that also functions as a side table. this way, you pare down in pieces of furniture but still have all the options of a larger space.

when i moved into my 2-bedroom condo last year, i knew i needed to keep the configuration simple yet still needed to accomplish the aesthetic i was aiming for. think pottery barn meets williams-sonoma home meets restoration hardware meets ballard designs but on a home goods budget. thank goodness i had pinterest and was able to create my own virtual design board- some with the actual items and others are look-alikes.

{1} actual sofa i purchased from hamilton sofa gallery on sale for $499
{2} similar to 2 RL lamps but in brass i got on sale at home goods $79 each
{3} similar ottoman i got on sale for craiglist for $75
{4} 2 ballard designs chairs i got on sale for $299 each
{5} green ballard designs garden seat i got on sale for $90
{6} 2 side tables i got from overstock.com for $59 each
even though i have 2 side chairs and a sofa, i knew i still needed more seating for when i have people over. i fell in love with stools from ballard designs and found inspiration for my diy project- pair o' stools.

my mom had these 2 antique stools from my yaya's house that were in horrible shape and weren't being used. with my addiction to pinterest came my new perspective on all things that might just need a little TLC. so i saw potential and took them off her hands. one stool had a lovely 70s print and the other had a faux suede - totally went with my decor. not. so here's the finished product:
so while i don't have the before pics of any specific steps to re-upholster the stools, i can give you a few helpful tips when it comes to re-upholstering anything. keep in mind each upholstery project will be different due to the construction of the piece of furniture, but here are some things to keep in mind:

- think outside of the box for fabric. there are plenty of places online or in-person to find what you're looking for, whether it's on etsy.com, amazon.com, joann fabrics, or a local retailer. but when i couldn't find anything i wanted in the price range i needed, i sought out an unlikely source: target's curtain section. yes, my stools were reupholstered for a total cost of $14 for 1 curtain panel. i am a genius.

- be gentle taking off the original fabric. this is your pattern for cutting your new fabric to size. and always, always, always cut an extra inch at the minimum. you can fold it under before you staple it into place and alleviate the headache of sewing anything.

- keep whatever materials you can from the original construction. i managed to salvage the nailhead trim and foam that was on there from my yaya's which again saved me a boatload of money. that stuff is not cheap.

- invest in or borrow the right tools. i luckily inherited a staple gun from my great aunt and uncle's big move, so that was a huge help in securing the fabric to the frame. but removing the nailhead trim and the staples from the original fabric was a hassle until i came across a tack remover at my local joann's. it was a lifesaver for only $6.

- don't be too hard on yourself if it isn't perfect. this isn't your full time job. you aren't a professional decorator (as much as you'd like to be one). your name isn't martha stewart. so why do you expect the project to come out as such? this was a hard one for me to learn- and i still am. but your friends and family will be so impressed at your accomplishment, they will not notice the flaws that you've had time to pick up on. so enjoy it and feel proud!

there are tons of sites online to help with different levels of difficulty with upholstery projects, but one image that was extremely helpful was the following. use it as a guide and get going!


xoxo Lauren


Tuesday, October 30, 2012

{diy} kitchenaid mixer

it's no secret that i like to bake. i find it therapeutic and rewarding. and i don't limit myself- recipes for cookies, cakes, bars, breads - none are off limits from me and my tummy. yum.


pumpkin banana bread muffins - recipe to come!
so before i start sharing some of my fave recipes and new ones that i find (more than likely thanks to my not-so-small addiction to pinterest), i figured i'd show you my number one tool for perfect baking: my kitchenaid mixer. now, before you start huffing and puffing about the cost of kitchenaids or how you can just use a hand-mixer or even a spoon, let me set the stage for you.

for yearssss i settled for the spoon method of mixing and the occasional usage of a hand-mixer, but i coveted the kitchenaid. it all started at an early age with my yaya, or 'grandmother' in greek. she knew that since my mom wasn't big into baking, it was up to her to instill the the love on baking in her only granddaughter. we started small with cake mixes and thanksgiving pies, eventually moving onto the traditional greek desserts of baklava and kourabiedes (don't worry- i'll share recipes later on). i am so grateful for the memories that i will always hold dearly, especially since yaya passed away in 1997.

recently, my great-aunt aurania (yaya's twin sister) moved to florida and bestowed her beloved kitchenaid to me. so exciting!!! and, yes, i saved a ton of money by getting a hand-me down. however, it was a lovely rusted almond color. yay. and went perfectly with my white / williams-sonoma decorated kitchen. ha.

determination + pinterest + a good 'ol rustoleum product = a new-found lease on life for this kitchenaid!
kitchenaid pre-makeover- all components removed and sanded.
kitchenaid post-makeover. so happy with the end result!

i would do a play-by-play of how i did this, but i'm going to give credit where credit is due. maria at you craft me up -- well done, fellow blogger! thanks for the tips/tricks to help me save a ton of money and preserve a family heirloom. :)


xoxo Lauren


Friday, June 24, 2011

Cheap et Chic: Ballard Designs

Those who know me also know I have an addiction. Yes, my name is Lauren and I am an online shopping addict. HA. It once got to the point where my roommates would take any box that came to our house, and assumed it was for me.

Here's the thing: most of the time, you can find exactly what you want online. AND you can almost always find a coupon along with getting free shipping. So- it's a money saver. I mean, it may not be a money saver if you are shopping like it's the end of the world (I have calmed down, trust me). But it's definitely worth looking around to find inexpensive counters online to what you may have seen in a magazine, catalog, or in stores.

So of course, as I begin to re-vamp the condo, my affinity for certain home decor stores has peaked. One of my faves is Ballard Designs. I have always been fond of their mix of Parisian-French asthetic with the cool, relaxed California vibe and Southern charm. But anyone who has looked through the catalog or the website knows that most of their items are not cheap by any means. Here in lies my "Cheap et Chic" need to get the same look for a better price. For those not French-inclined, 'et' means 'and'. There's your foreign language lesson for the day.


My first find was Spring 2010, before I moved into my first apartment. I had been IN LOVE with this print from Ballard Designs for the longest time and came to the realization (or at least convinced myself) that I deserved a nicer piece of artwork for my new abode.

Ballard Designs 'Seek Happiness' Print

However the cost just kept getting to me- $250 for a print that, inevitably, I will eventually get tired of? So I looked around...and WAHLAH! (Not really sure if that's how you spell it, but you get my point.)


World Market 'Seek Happiness' Print.

World Market to the rescue! This print, same size and quality, was only $129 at my local World Market store. It was such a great find and helped to make my apartment a home. Here it is in my old apartment:

Christmas time, obvi.

After I move in this weekend, I'll update the post with it's new spot in the condo. And be on the lookout for more "Cheap et Chic" finds!

xoxo Lauren

Tuesday, June 21, 2011

Black and White, Pt. 1

So life has been a little crazy lately. Let's see- my workload has more than doubled, with everything due by June 30th. I have been feverishly prepping the condo for move-in on the 25th. And I have been trying to pack up the apartment (3 boxes so far- ugh). But the majority of my time has been spent on my next project: painting my cabinets.

Now, let me set the stage for you. The kitchen and bathroom cabinets- while in good shape- were in a pickled style of, for lack of better description, a nude flesh-tone color. Yup, it was prettttttty. HA. So, a few weeks back, I began to reach out for quotes to paint them from professionals. Everyone I had talked to that had done it said it wasn't worth my trouble and totally worth having it done by someone else. Welp, quotes started rolling in and were in the $2-3k range. No, thank you.


Before: Blech.

Before: Double Blech.

That's when I turned to the blogosphere. Yup, my fellow people were my saving grace. With just a simple search on Google, I came across Rustoleum Cabinet Transformations. What a God send! Everything I need (well, aside from paint brushes, dropclothes, and gloves) in one box. And- for only $80. Yipee!


Rustoleum Cabinet Transformations.

Rustoleum Cabinet Transformations Kit Contents.

Of course, I also needed something to do while everything is drying- a bottle of red and the latest copy of the Washingtonian. Thanks, Dad!!!


My mental release during this process.

It took me about 4 days (2 of those over the weekend- so think 2 full days and 2 evenings after work). The key honestly is making sure the cabinets are prepped properly and have enough time to dry.

Step 1: Remove all cabinet doors and space them out properly, then remove any hinges. Also remove any fixtures attached to the cabinet frame and fill holes with wood filler if you don't plan on using the same holes or fixtures after the painting is done. Make sure to tape up the walls and inside of the cabinets. I used Frog Tape.


The pre-paint cabinet frame- minus the doors.

Removing the hinges from the cabinet doors.

*TIP #1: Make sure to get a dropcloth that has a plastic film on one side so any paint or topcoat does not seep through onto the carpeting.

Step 2: Deglossing. This is honestly the hardest and most labor intensive stage of the whole process. However, it's one stage that takes care of stripping, sanding, and priming all in one. Yes- you read that correctly. No stripping, sanding, or priming with the Rustoleum Cabinet Transformations kit. And when it says to use the deglosser liberally, it's not joking: pour that stuff on there and get scrubbing!

*TIP #2: Pay extra attention to this stage. If it is not done thoroughly, the paint will not adhere properly to the cabinets and all your hard work will be ruined.

Step 3: Wipe down the deglossed cabinets/frames with a damp towel until you see no more soapy residue, and then wipe it with a clean towel. I found a pack of like 20 microfiber towels from Home Depot for like $5. Totally worth it for this project and others around the house.

*TIP #3: Let this dry overnight. I honestly feel that drying overnight saved me a lot of heartache in ensuring the paint adhered to the cabinets/frames.


Dry, baby, dry!

Step 4: Get painting! For the bathroom cabinets/frame, I used 2 coats of the tinted dark color base. I cannot emphasize it enough: LET THE PAINT DRY THOROUGLY! This means 2-3 hours, although I leaned more towards 3 hours. After the 2nd coat, let it dry overnight. Trust me, you'll thank me later.


Coat #1.

As you can see, the first coat is very light.

*TIP #4: Make the first coat a lighter one. It's kinda like painting your nails: just cover all your bases in the first coat, and then go back over it to make it look pretty. :)

Step 5: The protective top coat. For the darker colors, the topcoat will show as a milky-white coat. But keep in mind it will dry clear. This needs to dry overnight in between each coat, and I ended up doing 2 coats on the front of the cabinet doors and the frame. After the first coat, fingerprints were showing pretty significantly, but the 2nd coat helped a lot with that.

*TIP #5: This dries quickly and drips even faster. Make sure you take your brush around the sides of the cabinet doors and the other side of the cabinets to catch any. Otherwise, you will have little pools of dried topcoat to sand down later.

Step 6: Add your hardware! I got a pack of 25 brushed nickel door handles from Home Depot for $30. This will cover my bathroom and kitchen with a few to spare. Totally worth the investment and they look just as nice as those from Pottery Barn.

*TIP #6: Put painter's tape on the area you are looking to drill your hole into for the doors/drawers. This will help you know EXACTLY where you want the door handle and it will prevent the door/paint from splintering.

So that's it- pretty cabinets that look like a whole new vanity for about $95, hard work, and a few days of your time. I did an awesome job, if I do say so myself.
Not to shabby.

Finished product!

Next post...I tackle the kitchen cabinets with white paint. Here I go again...