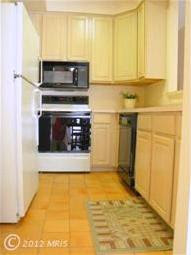
my home purchase is a real life example. i briefly touched on this in my previous post about my bathroom re-do, but the kitchen was the epitome of the overall decor. the cabinets were beige and pickled. the countertops were pink formica. the main light fixture was a box light that, after removal, we discovered was also painted pink. all of this was highlighted by lovely original almond-colored appliances that were on their last leg to say the least. here are a few images from the listing.


instead of seeing the negative, i saw a blank slate of which i could do with it what i wanted. i liked the layout and the high ceilings. the cabinets, while an ugly color, were in good condition. i wasn't dealing with someone else's upgrade choices- i was getting to make my own. it was the perfect situation for me.
from here i decided on a french-californian aesthetic to match the rest of my condo. i knew i needed light colors in the kitchen since it has a large pass-through which can be seen from most of the living spaces. so soft white cabinetry with carrera marble and stainless steel appliances were it for me. little did i know how pricey everything would come to. here are a few pics of what i envisioned. i laugh to myself now when i see them. lol.


immediately, carrera marble was out and i was left to research alternative countertop options. of course i looked at the ever-popular granite colors, but none of them fit into the design i was looking for. after exhausting every website under the sun, i decided on bianco river silestone and found a local vendor that i trusted to install it. in order to cut costs, dad and i removed the formica countertops overselves. this is my...
TIP: if you can remove your old countertops yourself, do it. this saved me $400 at minimum. go to your local home depot, lowe's, or hardware store and explain what you're trying to do. they'll point you in the right direction of tools to purchase or rent.
it just so happened that there was a mix-up with my vendor and my selection was out of stock. what did i get instead?! an upgrade to a new silestone color that was introduced in 2011- lyra. to say i am pleased with the end result is a severe understatement. people always ask me if it is carrera marble. of course, i am quick to tell them that it's a cheap look-alike and proceed to give them my contractor's information. just that kind of person.
for appliances, i purchased all of them at my local best buy. i have a rewards zone membership, so this was a no brainer to me since i was able to get money back on my purchases which inevitably went towards a new blu-ray player. i also happened to catch them at a great time when they were having a sale offering free installation of the dishwasher. woo hoo! savings all around and i was able to get the french door fridge i had been drooling over. yay me!
now for the real project at hand: the cabinets. as i mentioned before, i looooved the color (did you sense the sarcasm?!). i began reaching out to all my painters getting quotes. would you believe that even with a realtor discount they were quoting me $3000 just to paint the cabinets?! for that money, i could have bought all new cabinets from ikea! i knew there had to be another option. so i was relentless in my research and stumbled upon rustoleom's cabinet transformations. i've already sung the praises of this product in my previous post about my bathroom vanity, along with provided detailed instructions/tips/tricks. so without further delay, here is the end result with the soft white kit. i opted not to use the glaze, but feel free to do so if you choose!
.JPG)
.JPG)
.JPG)
.JPG)
.JPG)
.JPG)
as you can see, it's an amazing transformation. i did install a subway tile backsplash myself which i will cover in a future post and am still mulling over flooring choices, but i am soooo happy with my kitchen. it completely fits my personality and just shows you that with a little vision, an ugly duckling of a room can turn into a beautiful swan.
xoxo Lauren
love it lauren, you have done such an amazing job and it looks great.
ReplyDeletexo rach
ps do you have a microwave?
nevermind i see it on the side! i noticed you put in a hood and took out the built in microwave so i was just curious! xo
ReplyDeleteyeah, they originally had it above the range but it was too close to the stove top. this way i've have the best of both worlds. :)
ReplyDeleteThis double bowlkitchen stainless stee sink has a 60/40 design, which means that the left basin is slightly larger than the one on the right. You can use this difference to help keep the dirty dishes separate from the clean dishes while you wash them, moving them between each bowl as you go. Alternately, you could put your larger pots and pans in the bigger bowl and your dishes and glasses in the smaller one so that you don’t end up with the small items trapped under the bigger ones when the sink starts to fill up. It’s all really up to you, since the size difference just opens up lots of usage options.
ReplyDeletelouis vuitton replica bags neverfull replica bags and shoes 9a replica bags
ReplyDelete